Monday, January 30, 2012

Experiment 4 - Calzones - The Results


I was looking forward to this week's experiment more than any other I've done so far - I love a good calzone.  I did a little research on Tony and Lucille's, the reported source of the recipe.  There were several mentions of this being the restuarant where calzones were invented, but I was unable to find any source.  Interesting to think about anyway.

In my selection post, I'd said I wasn't going to make more than two calzones, but upon further consideration, I couldn't really see a way to cut the dough recipe in half - one package of yeast didn't seem like something I'd want to try to divide, especially since this was going to be my first experience with a raised dough.  So four calzones it was to be.

When I went out to do my shopping in preparation for this week, I determined that I had no interest in spending $6 or more for three ounces of prosciutto.  I found a much better deal at Costco - $8.99 for a pound, but then I'd have to use the opened package within a few days, so it would have been a waste anyway.  In the end, I decided that pepperoni would be just as good to use as a filling.  One other small shopping annoyance - I was going to need one pound of ricotta.  The larger containers at the store are 32 ounces, so you'd think that the smaller one would be 16 oz, right?  No, those are only 15 oz.  I was going to be an ounce short, but that was going to be split among four calzones, so I figured it would have to be OK.


Making the dough was simple enough - dissolve the yeast in the water and olive oil, then slowly mix in the flour and salt.  Actually, the recipe had a cryptic (to me) sentence that says "add the salt at the same time".  At the same time as I was mixing the flour, or add it all at once?  I ended up dumping it in as I was mixing in the flour.  After everything was mixed, it was time to knead the dough for ten minutes.  Easy enough.  Then roll it up in a ball and put it in a greased bowl to rise for 90 minutes.

While the dough was rising, I baked the sausages I'd bought, then steamed the spinach.  I also got the cheeses ready, spliting the ricotta into four roughly equal parts and microplaning some parmesan.

After the dough had risen to roughly double the size ...

it was time to startt assembling things.  First I had to punch down the dough.  Ka POW!  I split it into four pieces and rolled those into balls.  Each ball got rolled into an approximately nine inch circle, and then it was time for ingredients (spinach not shown).

For the spinach and sausage, I combined half of my ricotta, the sliced up sausage, the shredded mozzarella and some pepper and mixed thoroughly.  Half of that mixture got placed on each circle of dough, which then got folded in half, sealed with a fork, and brushed with olive oil.


The one on the left was my first attempt, so I guess I got cocky, and the misshapen lump on the right was not quite as pretty.  Oh well.  These got popped into a 450 degree oven for 30 minutes.  The end result ....


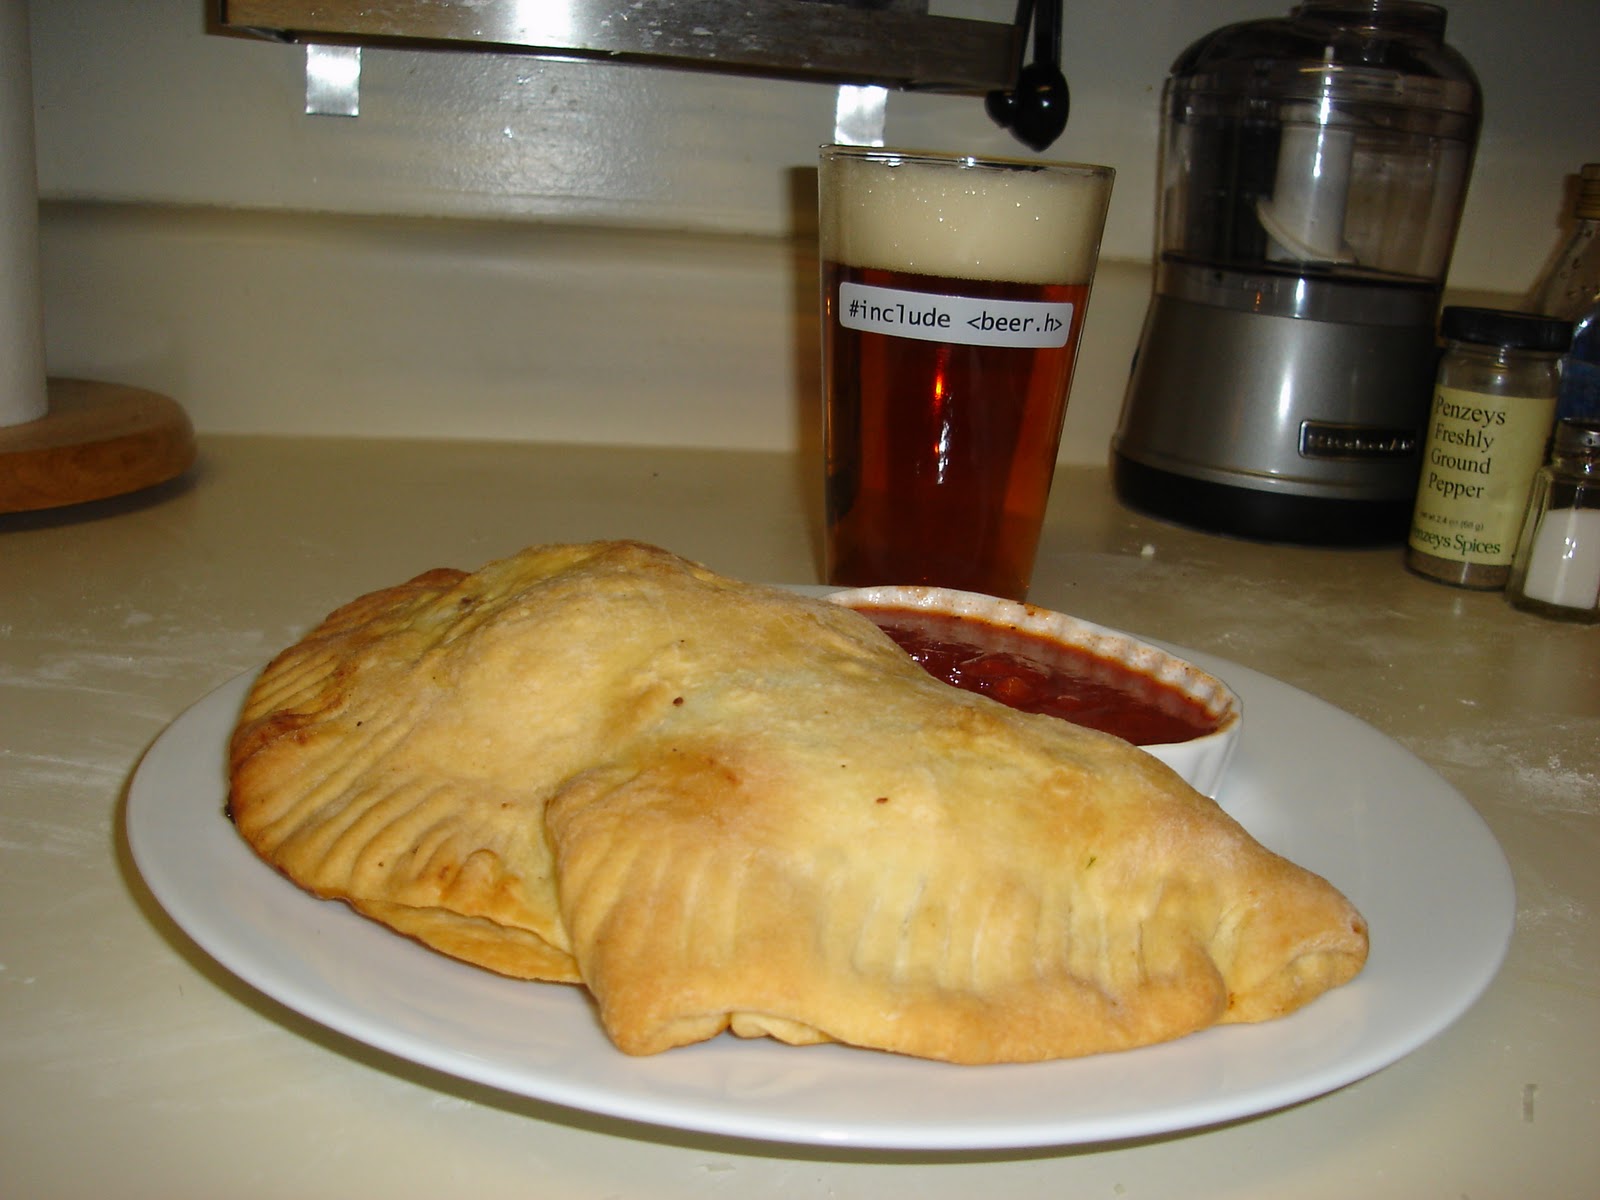
I used the Trader Joe's marinara as mentioned in the selection post, poured into a small ramekin and warmed up in the microwave.  I served with a tasty Sierra Nevada Torpedo IPA.  (And truth be told, I used the better looking calzone for the photo.  I ate the sad looking one).

For the cheese and pepperoni version, the process was nearly the same, combine the ingredients (except the pepperoni) and spread on the dough.  Lay the meat out on top (you can see how this would easily be done with prosciutto instead of 'ronis), fold the dough over, seal, oil, bake.

OK, so bottom line ... both versions were good, except that the crusts were a little too hard.  Turns out that when kneading the dough on a floured surface, one shouldn't just keep adding flour to keep it from sticking.  The recommendation I got from a chef friend is to oil the surface next time.  Also, as much as I love my TJ's marinara, it wasn't quite the right sauce for this meal.  Or maybe the tiny little ramekin wasn't the right vessel. No matter what, this was probably the best recipe experiment result I've had so far, and I'll definitely try making these again.


Lessons Learned - Easy on the flour, bro.

Tools needed - nothing new this week.  Having the micro-planer for the parmesan was quite handy.

Skills needed - I think I did OK this week, and aside from the flour issue I wouldn't do anything differently.

Wednesday, January 25, 2012

Experiment 4 - The Selection


And we're back the Hartford Courant, but this time we have a date.

This is the "Recipe Exchange" column from Wednesday, June 6, 1990.  It was on page E4.  One reader had requested a calzone recipe that had appeared in the Courant's Northeast magazine (last seen in my first experiment, the tomato soup), and three readers came through.  One of the respondents says, in a quote that hits close to home, "found the recipe I was looking for, between three recipe boxes and several hundred stacks of [clippings that were] ripped and torn out of magazines and newspapers ..."  Hmmm, yes, I know about the stacks.

Apparently the ultimate source of the recipe is Tony and Lucille's, a restaurant on New Haven's famous Wooster Street.  

We're going to start with Calzone Dough

1 package of dry active yeast
1 cup warm water (about 115 degrees F)
1/4 cup olive oil
1 teaspoon salt
3 cups flour

To the best of my recollection, I've never made anything that has to rise (except bread in my bread machine), so this is going to be interesting.

Then I've got my choice of Cheese and Proscuitto Calzone or Spinach and Sausage Calzone.  I love me some spinach, so let's hit that one.

Calzone dough
1 pound fresh spinach, steamed, well-drained and chopped
2 sausages (hot or sweet) cooked and sliced thinly
1 pound ricotta cheese
1/2 cup shredded mozzarella
Salt and pepper to taste

Oh what the heck, might as well include the other ingredients list too.  Looking ahead to the actual cooking instructions, the basic technique is "roll the dough into a circle, combine the stuff, put equal portions on each piece of dough, fold, bake", so if anybody is following along at home, and prefers prosciutto to spinach, I've got you covered.  Obviously more specifics will be provided after Saturday.

Calzone dough
1 pound ricotta cheese
1/2 cup shredded mozzarella
1/2 cup grated Parmesan
12 thin slices prosciutto
Freshly ground black pepper to taste
Olive oil

Note that the dough recipe yields enough for four shells, and the fillings provide enough to make four calzones each.  I'll be making no more than two.  Quite possibly I'll make one of each; it depends on the quantities of ingredients I can find at the grocery store.

The column also includes a recipe for tomato sauce.  I'm am probably going to skip that and just use a jar of Trader Joe's marinara, because I love that stuff.  If I get crazy and decide to make sauce, I'll throw in the whole recipe in this weekend's post.

Monday, January 23, 2012

Experiment 3 - Pepper Steak - The Results

This week's selection was Pepper Steak from a Betty Crocker Recipe.

Shopping was no problem at all this week.  I guess I'm getting used to the whole "medium onion" thing.  On the other hand, the pepper I picked up were huge.  They're kind of hidden in the picture, but they were the two smallest ones I could find in the stack at the supermarket.


I chose to pick up a package of rice noodles instead of the called for rice.  That created a small problem later; I'll get to that.  Also in that photo is the great big hunk of top round that I bought.  It was over two pounds, so I cut and weighed the 1 1/4 pounds called for and put the rest in the freezer.

Prep work was fairly simple, just a lot of slicing.  The steak was supposed to be in 1" by 2" by 1/4" strips.  Do not be surprised when I tell you that I didn't get out my ruler.  Neither did I measure the 1/4" slices of onion.  I cut the stems off the peppers, sliced them in half, got rid of the seeds and sliced them into strips, 1/4" yet again.  In the end I only used about one and a half of those giants. 


 I went ahead and browned the steak in the oil, then added the sliced onions, ginger, garlic, salt and water.  (as noted in the selection post I don't have garlic salt, so I used garlic powder and salt).  After quickly bringing it to a boil, I covered it and simmered for ten minutes.  While the simmering was going on,  I  took that time to cut the tomatoes into eighths.


Here is where the rice noodles became an issue.  I'd only read the package briefly, so I didn't notice that in addition to cooking them for five minutes, I was supposed to soak them in cold water for half an hour before hand.  That was going to throw off my timing.  Ah well.


Anyway, the peppers were to be tossed into the simmering mixture for the last five minutes.  I did that on schedule, and in order to get a bit more spiciness into the mix, I threw in a couple whole cayennes. Then I mixed the soy sauce and corn starch together.  After the end of the scheduled simmer, I added the sauce mix and stirred till everything thickened up a bit.  Raised the heat to get it all to boil for a minute, then dropped it down to a low simmer while I waited out the noodle soaking.

Once I tossed the noodles into boiling water, I dropped the tomatoes on top of the pepper steak mixture, and five minutes later, everything was ready.


How was it?  In a word, bad.  Even with all the extra simmering time, it was like none of the flavors combined - not even my ad libbed cayennes.  In retrospect, I do question the relatively small amounts of ginger and garlic.  My only hope is that something magical will happen to the leftovers in the fridge.

I also completely forgot about the frozen egg rolls I'd picked up at Trader Joe's, so I tossed them in them microwave.  Just a soggy as you'd expect.  The wine was suggested by the wine guy at TJs, a chianti.  It didn't thrill me either.

Lessons Learned - read and reread any and all instructions, in the recipe as well as on any packaged foods

Tools needed - nothing new this week, although I have noticed that several of the recipes I've done call for smaller amounts than my set of measuring spoons offer.  I think I can eyeball 1/4 of a teaspoon well enough.

Skills needed - nothing special this week

Thursday, January 19, 2012

Experiment 3 - The Selection


I took yesterday off in support of the SOPA/PIPA blackout.

This week, I pulled out something that isn't a clipping from the Hartford Courant.  Hooray!  I selected what must be a sample page from "Betty Crocker (R) Recipes for Today".   Copyright 1986 by General Mills, Inc.  There is a photograph on the front side, which is labeled as page 57, the recipe is on the reverse.  I figure it's a sample page because I know I don't have the whole book.

And the recipe is ....

Pepper Steak

Says right here that it's a good source of protein, vitamins A and C, thiamin, riboflavin, niacin and iron, so I got that going for me, which is a good thing.

1 1/4 pounds beef top round or sirloin steak, about 1 inch thick
1/4 cup vegetable oil
1 cup water
1 medium onion, cut into 1/4 inch slices
1/2 teaspoon garlic salt
1/4 teaspoon ground ginger
2 medium green peppers, cut into strips (3/4 inch wide)
Uncooked instant rice
1 tablespoon cornstarch
2 to 3 teaspoons sugar (optional)
2 tablespoons soy souce
2 medium tomatoes

First thing I'd like to ask is "what is UP with the order those ingredients are listed?"  Scanning through the actual cooking directions, I see that the rice is cooked separately, and the pepper steak is served over it.  So why is it listed in the middle of the list?  I think Betty was into the cooking sherry.  Anyway, I'll skip the "instant" rice and make the regular stuff.  I'll be skipping the sugar too, and it seems that there's a lot of oil which is basically just used for browning the beef.  I'll play that by ear.  Finally, I have garlic powder, but not garlic salt, so I'll use a little table salt and a little powder and see how it turns out.

As written, this should be four servings at 760 calories each.  It's unclear if that's with or without the sugar.

There's also a recipe on this page for Beef Kabobs, so maybe I'll throw it back into the box for potential future selection.

Sunday, January 15, 2012

Experiment 2 - Basic (Microwave) Cupcakes - The Results


I was really intrigued by he recipe's requirement for a "cupcaker".  My initial searches came back with all kinds of silicone baking pans of course, but let's be honest, the pre-1995 world didn't have a lot of silcone bakeware.  Deeper searches revealed an ad on this newspaper page from 1976 (!) featuring a (damn expensive) microwave oven that came with a "cupcaker", but I didn't find anything more.  So without a time machine and a plane ticket to Spokane, how could I make this recipe?  More on the ultimate resolution to this conundrum below.

Then of course there was the 1-ounce envelope unsweetened no-melt chocolate.  Searches revealed that Nestle makes a product that matched this description.  The first supermarket I checked in had no such item, of course.  What about K Roger?  Nope.  And even though I try not to go there, I visited Whole Paycheck (late on a Friday afternoon, even), but no joy.  Yes, I know it's listed at Amazon, but a) I don't need six, eight ounce packages and 2) if I pick a recipe on Wednesday to be cooked/baked on Saturday, online shopping isn't going to cut it.  (No, I don't have Prime and besides, this item isn't eligible).  So no chocolate cake.

On to the preparation...

I had to ask an important question - sift then measure or measure than sift?  Maybe it's common knowledge, but this is all about teaching myself new things.  It's the latter, just in case anybody else needs to know.  I was supposed to sift the baking powder with the flour, but I misread that part, so I stirred it into the sifted flour separately.  In another bowl I creamed the butter then added the sugar and creamed some more.  The very exacting directions in the recipe then called for adding the dry ingredients (i.e. the flour and baking powder), then the milk mixture (i.e. milk and vanilla), alternately, ending with the dry ingredients.  Seemed very fussy but I did as told, and beat it all until smooth.

Then it was time to bake, and here is how I resolved that cupcaker situation.


I had bought this package of silicone "LCD Segment" dealies at least a year ago from Think Geek, but had never used them.  There's a recipe on the back of the box, but like many items from Think Geek, these came from the UK, and the recipe was all in grams and stuff, and I never got around to trying to figure out the converstions.  Also like many items from Think Geek, they don't seem to be available anymore.

The directions called for three to five minutes, and I ended up using two 1:30 cycles.  The little cakes came out OK, if a bit lopsided and unevenly sized.  I did end up with a dozen of them, so the yield was right on.

I did some half-hearted searching for frosting recipes, but wasn't really happy with the ingredients listsI found, or trying to modify "32 servings" to 12 cupcakes (what's a serving of frosting anyway?).  So I tried to wing it.  Yeah, well, the less said about that the better.

There was going to be a photo here with the "frosted" cakes arranged into some digits, but upon review, the photo looked like crap, so I'm sparing myself the embarrassment.

How were they?  Well, not so great, actually.  A little dry and dense.  Rubbery.  No matter what syndicated columnists were trying to peddle back in the day, I don't think microwave ovens are made for baking.  That said, I still might try to recipe from the back of the "cake mould" box, since I have a fairly new kitchen scale that I can use for European style weight based recipes.

Lessons Learned - old recipes may include items that are not readily available.  Luckily that chocolate stuff was optional, and I had alternate baking vessels on hand.  Not sure how this might play out in the future.

Tools needed - I had to buy a sifter.

Skills needed - I could probably improved my technique when creaming butter and sugar.  That might account for the denseness of the resulting cakes.

Late breaking news - I had occasion to visit the fabulous Atlee Virginia Kroger this afternoon, and lo and behold, they stocked the Nestle pre-melted chocolate.  So I bought some to have on hand.

Wednesday, January 11, 2012

Experiment 2 - The Selection


I had been thinking that it would be nice if the luck of the draw gave me something to bake this week.  Well, sort of.

This week's recipe selection is Basic Cupcakes.

The twist is that recipe is from a newspaper column simply called "Microwave".  Once again, it comes from an undated clipping from the Hartford Courant.  That will be quite a common occurrence, since the titular Box was filled when I still lived in Connecticut, and evidently I felt no need to preserve the dates on what I was cutting from the paper.  On the back side of this clipping is the start of an article about Rosh Hashana, so again we can identify an approximate time of year, even without knowing anything more specific.  Certainly this pre-dated the 21st century cupcake craze, which I find more than a little annoying anyway.  For the record, this was a syndicated column by Jean Anderson and Elaine Hanna, and came from the Los Angeles Times Syndicate.

The ingredients:

1 cup sifted flour
3/4 teaspoon baking powder
1/3 cup butter or margarine
1/3 cup sugar
2 eggs
1/3 cup milk mixed with 1 teaspoon vanilla

Makes 1 dozen.

There are some variations listed - double chocolate, lemon, orange, fruit or nut, and coconut.  I might try the chocolate, which calls for a 1 ounce envelope of "unsweetened no-melt chocolate" and 1/2 cup of semisweet chocolate pieces.  I've never heard of this no-melt stuff, so I'll have to see what's available in the store.

The authors have included a recipe for Chocolate Glaze as well, which calls for:

2 cups sifted powdered sugar
2 tablespoons light corn syrup
1 to 2 tablespoons water
1 1-ounce envelope unsweetened no-melt chocolate  (There's that chocolate again!)

Now, will I have to buy a microwave "cupcaker" as they call it?  Where would I even find one?  Actually, I think I have a solution, but you'll have to check back for the results this weekend.

Sunday, January 8, 2012

Experiment 1 - White Chili - The Results

This weeks shopping trip did not result in as much angst as last week's.  I did not know that "Great Northern" was a type of bean, I thought it was a brand.  That was easy enough to work out once I did my pre-shopping Googling.  Then I got to the store and was a bit confused by chicken stock vs chicken broth, but they had both, so I got what the recipe called for.  Then on Friday night I wanted to do a quick check on soaking the beans.  I'd never done so.  Turns out there are a lot of opinions on how, why, when, to soak or not to soak...  In the end, I just went ahead and soaked as called for.  As an aside, when I bought the Great Northern beans, I also bought a package of barley and made homemade beef barley soup on Friday night, another first.  Yum.

As for the requirement to crush the oregano, I'd gotten some suggestions in the comments (thanks!), but then I stopped in at my new favorite discount store and look what found...

MOTAR!  Sounds like a foe of Gamera and Rodan and Godzilla.  It certainly became a foe of the oregano this recipe calls for!

But on to the cooking...  I got started on this a little bit later than I should have, because it calls for 2.5 hours of cook time.  Luckily there wasn't a lot of prep work required.  And since there wasn't a lot of prep, I didn't take many pictures.

The process was fairly simple.  Soaked the beans overnight, then drained them.  Tossed them into a large pot - I used a Dutch oven - with two cups of the chopped onion, the garlic, salt, and stock.   Here again, my onion size issues came up.  I guess the onions I bought were not up to "medium" specification, so I didn't have two cups of chopped onion to start with, and the recipe called for the "remaining onions" to be used later.  So I put in most of what I had and saved the rest.  Brought it all to a boil, then reduced the heat and cooked for two hours, covered.  Here is what it looked like when took off the cover to stir the pot, so to speak.

  
After two hours, the green chiles, all the spices, and those pesky onions went in and everything cooked for another 30 minutes (still covered).  

Easily served by spooning some into a bowl and topping with cheese. 


Note the darker color of the broth, that's all due to the added spices.  It tasted really good, although I have one quibble.  In the last half hour of cooking, when I opened the lid to stir, I felt a little overwhelmed by the smell of cloves, and got a bit of that with the bowl sitting in front of me.  I can't say that I tasted them separately, but I'm not a huge fan of the aroma (bad association with smoky bars and hipsters in my younger days), so I might skip that ingredient next time.  I did use twice the amount of cayenne called for.  I like cayenne, and it was a suitably spicy bowl of chili.  Would I make it again?  Definitely, or at least a halved version.  There's a whole lot left.  I'm going to broil some chicken later today to have with some of the leftovers.  And I might even put some salsa on top, 'cause that's how I roll.

Lessons Learned - pay attention to the total time required.  I ended up eating dinner at close to 9 PM, which is pretty late for an early riser like me.

Tools Needed - nothing else needed this week, now that I have MOTAR, who is a friend to children.

Skills Needed - nothing this week, what with the dead simple prep.

Tune in late Wednesday for the next selection....

Wednesday, January 4, 2012

Experiment 1 - The Selection


Before we get to the selection for this week, a couple other things.

At the end of my last post, I listed tools needed and skills needed.  I should also have added "lessons learned".  So for Experiment 0, my lesson learned is that there's a happy medium between "using a recipe as a suggestion and just winging it" (my standard technique) and slavishly following what's written down.  I could have avoided the cilantro issue if I'd taken the time to add it slowly and done some tasting, or even if I'd actually thought about how much I had and what I was doing with it.  When I had the leftover soup on Tuesday, I picked out as much of the green stuff as I could while it was reheating, and also while I was eating it.  It was a bit better, but I think most of the damage had already been done.  C'est la guerre.

And speaking of "tools needed", on January 1, I went to IKEA (a new tradition, starting last year) and got a garlic press, along with many other things not cooking related.  It's probably a good thing that the closest IKEA is nearly 90 miles away.

OK, without any further ado, this week's recipe selection is ......

White Chili

This comes from an undated clipping from the Hartford Courant.  Since I moved away from Connecticut in 1995, it has to be from before that.  Most of the headline was clipped, but the tail end says "[f]rom holiday meals", so I'm guessing it was published in December some time.  My clipping also has a recipe for Hot Crab Dip, which I might or might not make in addition to the main course.

Here is the ingredients list for the chili:
1 pound dry Great Northern beans, soaked overnight and drained
4 cups defatted chicken stock
2 medium onions, coarsely chopped
3 garlic cloves, finely chopped
1 teaspoon salt
1/2 cup canned chopped green California chiles
2 teaspoons ground cumin
1 1/2 teaspoons dried oregano, crushed in a mortar and pestle
1 teaspoon ground coriander
1/4 teaspoon ground cloves
1/4 teaspoon cayenne
1/4 pound Monterey Jack cheese (optional)

Looking over this list, I see those damned "medium" onions again.  I guess I'll have to get used to that.  I imagine that I'll be buying chicken stock in a can or aseptic box, so defatting is shouldn't be a problem.  I currently have neither a mortar nor a pestle, so I may find another way to crush my oregano.  Which sounds painful.  I think I'm set with the other ingredients, although I might have to check the provenance of my green chiles.  Oh, and cheese is never optional.

This recipe includes some nutritional information, so I'll tack that on.
Makes 8 cups.  Each cup without cheese has about 195 calories (10 cal from fat), no cholesterol, 290 mg sodium and 105 mg calcium.

Monday, January 2, 2012

Experiment 0 - The Results


The day after posting the ingredients list, I did some pre-shopping. Immediately, a problem. Well, more of a question than a problem -- are Roma tomatoes the same as plum tomatoes? When I was looking at the recipe, I was seeing Romas in my mind, but when I got to the store (actually, I went to two stores), nothing on display was labeled as "plum tomato". Of course, making something based on fresh ripe tomatoes at the end of December is already a bit of a problem, but I said I'd choose randomly from the box, so there you go.

And then there's the "medium" onions and garlic and "large" lemon. Perhaps these are terms that a professional chef learns to be able to estimate in his head.

To the internet! On the first question, I got as far as typing "plum toma" in the Google search box, and saw that one of the suggestions was "plum tomatoes vs roma" and it yielded plenty of results. Short answer, yes. It seems there are possibly other types of plum tomatoes, but Romas would be fine for this week's experiment.

The size problem turned out to be a little harder to figure out. I couldn't come up with the perfect search term. One on of my first attempts, I found this: "One medium onion = about 3/4 cup chopped onion." OK, great, I'll just take a knife, and measuring cup with me to the store and try to work this out. Then another result told me medium is about 3 inches in diameter. That was something I could work with -- 3π = 9.52-ish. I could take my handy IKEA measuring tape with me to the store, and be the dork standing in the produce section measuring the onions.

Oh, but wait, did you know there's a National Onion Association? Of course, why wouldn't there be? And they have a website. But they told me that a medium onion would yield a full cup when chopped, as opposed to the 3/4 cup I'd found previously. They also have a size chart, with medium coming in at 2 to 3 1/2 inches in diameter. Still needed the measuring tape, but at least I had something to work with.

Guideslines for the garlic and lemon sizes eluded me, and ultimately I was limited to what was available at the store anyway, so I just had to wing it. I did get one useful piece of advice from a friend who works in a restaurant kichen - "when told to use a large anything, buy two, use one, taste it and if it needs more, you're ready; if it doesn't, you're awesome."

Hmmm, maybe there should be an intermediate post to talk about the shopping woes. That's why this is called an experiment.


Now, about the actual cooking. In the end, I did decide to go with making a half version of the given recipe, which turned out to be a good idea for many reasons. The process was easy enough. Before I started in on the tomatoes, I peeled the onion and chopped it up in the small chopper. I also pulled a clove out of the garlic head and did my best to slice and dice it, since I don't have a garlic press.


Then it was time to work on the tomatoes. I had bought them at Trader Joe's, and they came in 18 oz clamshells, so I used my handy new kitchen scale to measure out exactly 2.5 pounds. I cut them in half and placed them on parchment paper on my largest cookie sheet. As noted, if I'd made the full recipe, I'd have run out of room quickly.


The tomatoes then went into the oven on "broil" for 10 minutes. While they were broiling, I worked on the cilantro. Bit of a pain in the ass there, but no major problem, except that the recipe called for it to be chopped, and I pretty much failed there. Before I knew it, the tomatoes were done. Maybe broiling and parchment paper don't go together too well. At least there wasn't a fire, or this would have been a short-lived experiment.


The recipe said to "brush off some of the charred skin", but to leave some, because it helps impart the roasted flavor. When I tried to do some brushing, the whole skin came off. So I just left it on mostly. Then I was supposed to remove the seeds using a teaspoon. Way easier said then done, unless there's a secret I don't know about. It took awhile and I did the best I could. Then I pureed half of them in the food processor and "finely chopped" the rest. Again, my chopping is weak, and plenty of seeds were still visible.
With the tomatoes ready and set aside, I sauted the onion and garlic in the olive oil. Once the onions were translucent, the tomatoes went into the pan and everything simmered on low, covered, for 15 minutes.


Finally, I stirred in the the cream, butter, cilantro, salt and pepper


and then it was soup time.


How did it taste?  Mostly I said to myself "Wow, that's a lot of cilantro."  I'm lucky not to be one of those people that gets the soapy taste from cilantro, but it really was somewhat overwhelming. I didn't notice a lot of roasted tomato flavor, but it may have been lost in the cilantro. It probably would have made a lot more sense to to add that a little at a time. Would I make it again? Possibly in the summer with actual ripe tomatoes, and a much lighter hand on the green stuff.

tools needed: garlic press
skills needed: chopping